Showing posts with label leathering. Show all posts

Monday, 24 October 2016

Leathering - the rush is on!

Hey folks - not much time these days to spend on writing up careful updates.  The Halloween deadline is fast approaching.

Today I dismantled both girdle sections and rounded all the sharp corners (52 of those) and ground, hammered, and/or filed all the rough edges (lots of those from tin snips).  I also smoothed out a few rough edges on the brass tabs and slots.


Corners were snipped off, then a dremel or file was used to clean up the fine corners and the aforementioned rough edges.  Steel wool was used to rub along the finished edges to take off any remaining wire edges / coarseness.

I also started riveting the slotted side of the girdle plates.  I am cheating a bit on these rivets since they mostly don't show.  Inside of making each rivet by hand from copper wire (as I have done for the decorative brass plates and hinges), I am using galvanised roofing nails.  These have the advantage of being less work and including their own washer - the nail head.  Once cut off and peened, their origin is only visible from the inside of the armour, which is not a concern for me.

I have not attached the topmost girdle band since I want to fine-tune the hooks and rivet those on first.


Saturday, 15 October 2016

Girdle Bands - Adding leathers

Not that long ago, I mentioned a lack of illustrative mistakes.  Today I will bring you at least two.

As you may recall, there are a number of made-up girdle bands waiting to be assembled.  Well, today's first mistake relates to those - I didn't put the rivets holes for leathering into the bands.  Now I'll have to add those (and put holes into the leather itself) with them already shaped, which is much less convenient.


First things first - I had to look at the pathetically mismatched eclectic selection of bands and determine front/back and what order I would hang them in.  Everything got labelled, probably past the point of common sense, but it's better to mark too much than to mark too little (and make a mistake because of it).

This brings me to an important armouring tool which (quite frankly) I had forgotten all about - soapstone.  Yes, those lovely "B"s are made with soapstone - not chalk!  Soapstone marks much better, is less fragile, and hits a nice sweet spot between being difficult to smudge but easy to remove.


Since I made the mistake of leaving this task until the bands were already bent, marking the points for rivets required a measuring string which I could lay across the inside of the lames.  I suppose I could have eyeballed it, but this seemed more foolproof.


As described in previous posts, a center punch is used to mark a nice divot in the metal where the hole should go.  The metal punch has a small tooth which is used to 'find' the divot and make sure you're putting the hole exactly where you want it.

Leathering is then the process of slowly adding each lame to the leather strip.  You can see here I am using nuts and bolts as my temporary "rivets" while testing the fit.  These will be replaced with actual rivets during the final assembly.


Note the black tape.  This is added to provide a visual guide of how much overlap is being added with each piece.


Also note that I'm still using second-hand belts for my leathers rather than buying the real stuff.


Our friend the leather punch makes an appearance again.


Here's another shot - note the how the black tape helps line things up consistently.


Finally, this brings us the to second mistake of this post.  After taking all these pictures and completing the first leather, it finally occurred to me that I need three leathers per girdle half...  I should have done all three at the same time!  Instead I had to take these girdle bands apart and start all over again from the markings to the holes.


Last picture from Saturday is the other half of the girdle bands all laid out and marked.


The more observant among your may have already noted that 5 simply isn't enough girdle bands... and you're right!  I actually have six for each side, but after a test fitting on Saturday evening I confirmed that even that would be a bit short.

Sunday's post covers the reaction to this discovery.

Thursday, 11 August 2011

New Leathering Method in Practice

I decided to put my theory into practice, to see if it could repair my faulty shoulder section.  The short answer is...  YES!  The only thing I changed was the holes in the straps! 


Below: Series of pictures demonstrating how the leathers flex when you raise your arm.  Note how the front & rear leathers stay flat and relaxed - only the central leather has to move.  You could optimize this by using a thicker leather on the front & rear and a thinner one centrally.


Some pictures of the releathering process...


Attach central leather to set the minimum overlap.


Below:  After attaching the central leather, I am tilting the lame to the desired angle so I can mark the new hole locations on the straps.  Note how this results in more overlap at the front & back than it does in the center.

(You don't strictly need to clamp things in place, but it definitely helped me to take pictures of the process. )


Again, attach central leather first to select overlap.


Angle the plates, mark the holes, etc.


My mirror is dirty... need some windex.


Maybe a little bit too much clamping....


Here are the leathers from inside that shoulder section...

Purple dots - original rivet placements (BEFORE picture)
Green dots - revised rivet placements (AFTER picture)


Below: The same image, except I have clearly labelled which sets of holes go together. 


Wednesday, 10 August 2011

A different method of leathering shoulders

I'm going to introduce a "pet theory" here, so excuse my prefatory rambling while I set up for my point.  A fair bit of thought and self-doubt went into it, but I've managed to satisfy myself that this is worthy of consideration, so here it is...

After a fair bit of reading here and there, and asking around on RAT, I couldn't find any "unearthed" historical evidence on exactly how shoulderguards were leathered or how much overlap there was between the plates.  As far as I can tell, the only thing we do know is the pattern of rivet holes where the leather was attached and the width of the shoulder lames.  It would seem that this is largely due to the fact that in all present finds, leather survives only as mineralized fragments near rivets - it tends to rot away without being preserved for future study.

We do, however, have some pictorial evidence - the occasional stele, frieze, and of course Trajan's column (whose authenticity with detail is widely doubted.)  While my investigation of these depictions can hardly be called exhaustive, I was struck by one element which seems to remain constant - The lesser shoulder plates just barely cup or cover the shoulder and then stop.

I believe this is a reliable datum, since it seems to persist across different time periods and styles.  And examining the "digital reconstructions" included in Bishop's Lorica Segmentata, Volume I: A Handbook of Articulated Roman Plate Armour, it would seem that I am not entirely alone in this belief.

Furthermore, a helpful RAT member has confirmed that a contemporary source listed 5'6" (in modern units) as the preferred minimum height for a legionary.  While this doesn't mean that there weren't any legionary midgets, it does suggest that most legionaries were slightly taller.  A quick check on google informs me that the average male height in the US, Canada, and UK is about 5'9", from which I conclude that the average legionary shoulder width was not significantly different from modern people. 
So if we know the width of the plates, the width of the shoulders, and how far they should reach on the shoulder/arm, the amount of overlap can be deduced to a certain extent.  We also know from unearthed plates where the rivet holes go.  Great!  We've answered the question of how the shoulders were leathered...  or have we?

While trying to reach the answers summarized above, I ended up looking at more than a few pictures of reenactor's seggies.  (This was motivated in part by the problems with my first complete shoulder. ) One detail which appears to a greater or lesser extent in a number of different people's photos of  both Corbridge and Newstead seggies is lesser shoulder lames hanging in a "stepped" pattern.  I've taken an edge-on shot of my own shoulder to provide an exaggerated example of what I mean - below.


This is a natural result of a riveting the edges of inflexible plates to a flexible strap.  You can minimize the visibility of this phenomenon by either loosening and/or narrowing your rivets, or by increasing the floppiness of your strap.  The latter option has the added bonus of helping the lames to lie down on your upper arm instead of rigidly projecting from your shoulder; but this requires thinner leather, constant/careful oiling, a long break-in phase, a different part of the animal hide, or some combination of the above.

But what if there was another option?  One which gave a more "natural" shape to the lesser shoulder guards even with thicker and/or less flexible leather?


While trying to resolve the issues in my own segmentata, I sat down with this proto-shoulder and experimented quite a bit with the position of both lame and leather holes.  While some options were better than others, nothing ever really looked 'right' when draped over my shoulder.  Eventually, I decided to ignore what I "knew" about leathering and just try to make exactly the look I wanted - by building the shoulder curve into the spacing of the holes on my leather.  Instant success!  Not only that, but the funny-looking "stepped" pattern is gone too. 


Initial Attempt - Mild curve, Leathers widely angled


The only "secret" here is that the spacing of the holes on the front & rear straps is smaller than the spacing of the holes on the central strap. When the shoulder is right-side up, the load is still distributed evenly among the three leathers -- the tension needed to tuck in the corners of the plate is negligible. It doesn't appear to affect mobility very much -- lifting the arm up requires flexion only in the central leather, and reaching forward-and-back motion is no different from the typical leathering method. I also think that pre-tilting the plates this way might allow the armour to "shed" glancing blows with less stress on the leathers. (We would need a reenactor to try this leathering method in order to get more concrete answers on these suppositions).

In terms of looking at the shoulder edge-on, this method greatly reduces the bizarre "see-through plate armour" issue, but the effect on protection against edge-on attacks would be negligible at best. However, it does ensure that the lesser shoulder more closely "cups" the shoulder -- just as it is depicted in friezes and steles. Given the level of detail in such depictions and the nature of artistic license, it's difficult to determine if there is any significance to this, but one can always hope. :)

One might think that this would not have been used historically because it reduces the "stackability" of a segmentata, but this is in fact false.  When placed flat on the ground, the central leather flexes and the lames all lie flat, just as is it does with the leathering method traditionally employed by reconstructionists -- I had to carefully position the shoulder guards to take the pictures shown here of the inverted shoulders.


Second attempt - More pronounced curve, and leathers follow a straighter rivetting pattern.


So in conclusion, I submit this as my own "speculative reconstruction" of the leathering of a segmentata shoulder section - one which to the best of my knowledge is compatible with all unearthed artifacts and historical depictions.


Saturday, 6 August 2011

Adventures in Leathering and Assembly


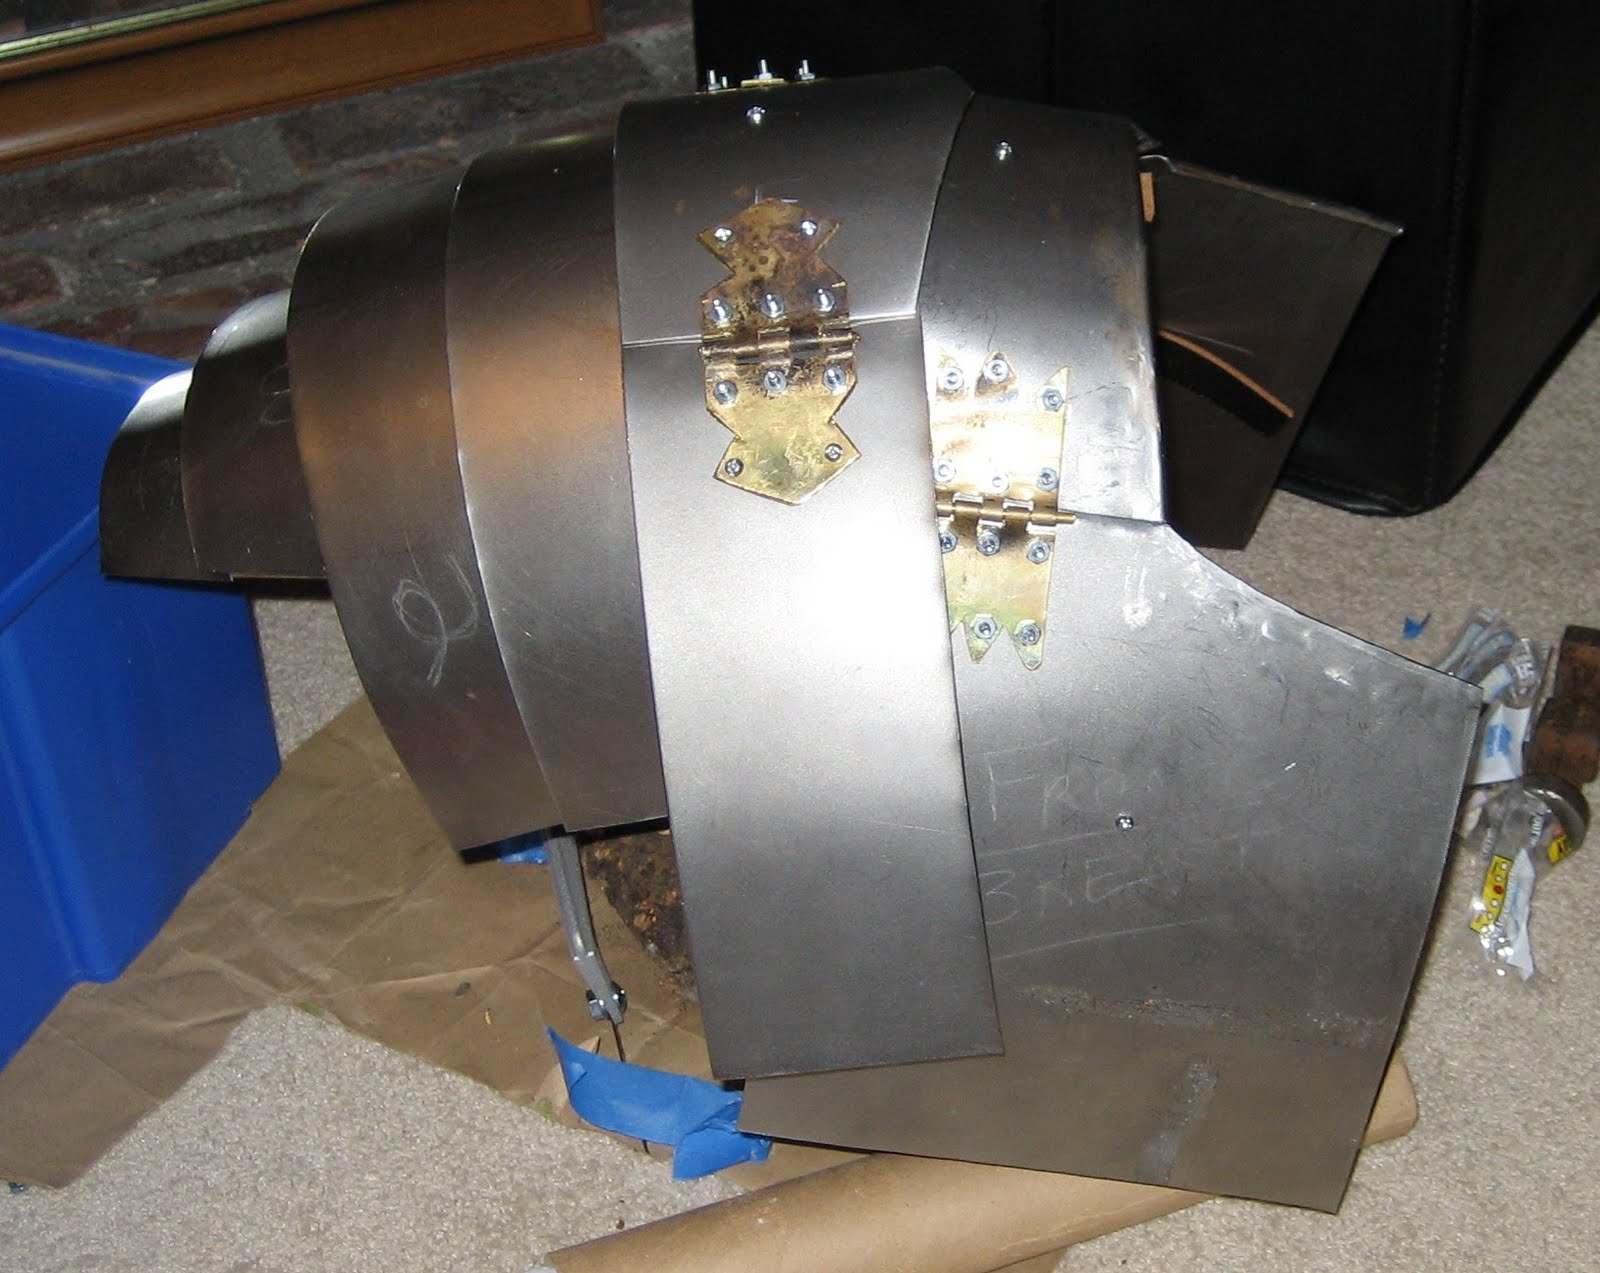
OK - As previously mentioned, I put holes in the lesser shoulder plates according to a pattern I was working from, and that turned out to have been a poor choice.  Anyways, no pictures of that process, but I will be outlining a leathering method of my own devising in the next post.  Above is our starting point - for better or worse, the lesser shoulder plates are assembled, and now we want to attach the upper shoulder guard and breastplate assembly.  As you can see above, I've laid the plates out flat so I can check how they are lining up while still accessing the central leather.  In this pic I've already marked and cut the holes on the central leather - that's the easy part.  Now we need to do the sides.
As you can see in the picture above, (and in several other pictures from recent posts) I sort of traced the strap outlines on the breast and back plates -- this was done while holding them upright (as though the shoulder was being worn).  After I marked the outline of where the strap would run, I eyeballed it and marked an "X" for the riveting point near the center of the plates.

After drilling the holes, I repeated the "hold upright and lay strap against plate" process, but this time I used a screwdriver to push through the new hole in the plate and mark the location on the strap.  Then all that remained was to punch the hole in the strap and connect the plates.

Below, I have connected the breast plates to all three leathers.  It's now time to attach the front and rear leathers to the upper shoulderguard - which turned out to be the most annoying part of the process of all.  Below, all plates are attached on the central leather -- only the front and rear leather remain to be completed.


I planned to use the same technique -- I'd fold the plates up as though the shoulder was being worn, and then mark the outlines of the strap on the plate.  This turned out to be a lot more difficult than I thought, with plates flapping all over the place, lames twisting out of true alignment, etc.  Then I tried setting the whole unit on a stump and tried to let gravity do the work for me:


Unfortunately, this made it more or less impossible to see or reach the parts I needed to reach.  Part of the problem here was in getting the upper shoulder to lie down properly on the collar pieces -- I'll talk more about that in a moment.  Anyways, after several minutes of hell trying to figure out how to do it I applied some engineering wisdom and solved the problem with duct tape.


That let me get inside to mark the outlines of the straps with my piece of soapstone.


However, while I was in there, I noticed a major problem in the making:


One of my leathers was running right across the corner of a plate, right along the hinge line.  That would probably wear out the strap and break it in no time!

So when I marked the riveting point on the upper shoulder, I deliberately put it a bit low on that side to force the leather to move away from the hinge line.


The moment of truth!


So there's a couple of problems with this shoulder. The top two issues:

1. Upper Shoulder Doesn't Fit Well.

This is because I took what is essentially a Corbridge A shoulder unit and attached it to a Newstead breast/collar/back plate set.  The central upper shoulder plate isn't wide enough to match the curve of the mid collar plate - In order to make things lie nice and flat, the upper shoulder front & back plates would have to make a sharp curve right in the middle of the hinge face.


2.  Lesser Shoulder Plates Don't Hang Properly


There are several potential causes for this, not least of which is wrong holes, wrong leather, wrong angles, etc.  Solving this issue is the topic of my next post.

Tuesday, 2 August 2011

Learning from my mistakes - First shoulder unit. (Long Weekend Part 2)

Next time I will do the leathering more sensibly and take pictures along the way.  For now, I will just give a summary of things I've learned from attempting to assemble my first complete shoulder unit.


1.
I had (unwisely) punched holes in my shoulder lames according to the pattern I was working from, and as a result my leathering did not turn out as quite as smoothly as I had hoped. One of the more noticeable issues is that part of the side straps are visible between lesser shoulder plates 3 & 4 because the holes were too close to the edge of the plates.  In the future, I will follow the more sensible advice from Alex Matras in his pdf - more on that in a future post.


2.
Less obvious is the slight bunching/twisting (shown above) of the shoulder leather to reach the holes in each lame.  This may look like I just goofed up on placing the holes in the leather, but the actual problem is that the leather is trying to bend in a zig-zag pattern to reach the holes.  I think this is what is causing the shoulder to be so stiff - Note how in this picture (further above), the lesser shoulders remain horizontal even when unsupported, instead of drooping to cover the upper arm. My choice of leather may also be to blame for this issue - perhaps I should have used something softer and more flexible? (i.e. thinner)

--------------------------------------------------------------------


3.
Attaching hinges to the breastplate - I had a bit of trouble trying to get the hinged breastplate/backplate sections to overlap correctly with the mid-collar plate. The biggest problem was that I had put the rivet holes in the hinge plate very close to the hinge tube, making it difficult to get an overlap which would not bump into the rivets as seen in my previous post about the upper shoulder. I should be able to correct this on my next set of hinges by placing the rivet holes a bit further back from the hinge tube, giving me more room to work with.

The other issue with making these plates overlap is getting the folded edges to play well together.  You can see in some of these pictures that I had to bend one plate a bit to make things snug up properly.  

Also seen in the above pictures -- Markings for leathering attachments.  This post is already getting pretty long so I'll talk about those later.

I will also need to purchase more nuts & screws -- I have used up 48 of them just for these four hinges!  Upon checking diagrams of historical hinges, I realized that there should only be five instead of six -- oh well.  As previously mentioned, these weren't historically accurate shapes anyways.

Below - closeup of my unfinished "Kalkriese-Inspired" hinge on the breastplate/midcollar plate.  You'll note that I haven't even peened the hinge pin on this one.  In the background you can see where I've marked the leathering point on the backplate.


----------------------------------


4.
Folding the mid-collar plate. You can see here (above) that I ended up with a few kinks in my nice folded edge. These were introduced while I was bending the plate, despite attempting to avoid this exact problem. I wonder if I should be folding the edge on this part AFTER it has already been bent... that would be much harder, though. Maybe I should start the fold, but leave it not quite closed?  Now that I've thought about it some more, I suspect the kinks formed in places where I had dinged the fold a bit, creating stress concentrators.  Maybe a better-finished fold would kink up less? Anyways, this is something I'll have to ponder after I've tried again with my second mid-collar plate.


Next post - Conclusion of progress from the long weekend.  I will talk about about the new breast/back plate combo I made and hammered.  After that - Installation of the final leathering points on the back/breastplate and upper shoulder guard.