Showing posts with label assembly. Show all posts

Wednesday, 26 October 2016

Too many rivets


Started off by riveting the shoulder lames that I rounded yesterday.

Also used baby oil to clean some old tape goop off the breastplate sections of this shoulder.  This works wonderfully although you have to be careful about scratching the metal.  The scrubber pad pictured here wasn't too bad, but on the next plate I tried soaking it for longer and just using my fingernail.  I guess there was some grit in there (or else my fingernail is harder than I thought) since even that approach left some scratches.  Anyways, the goop is gone.


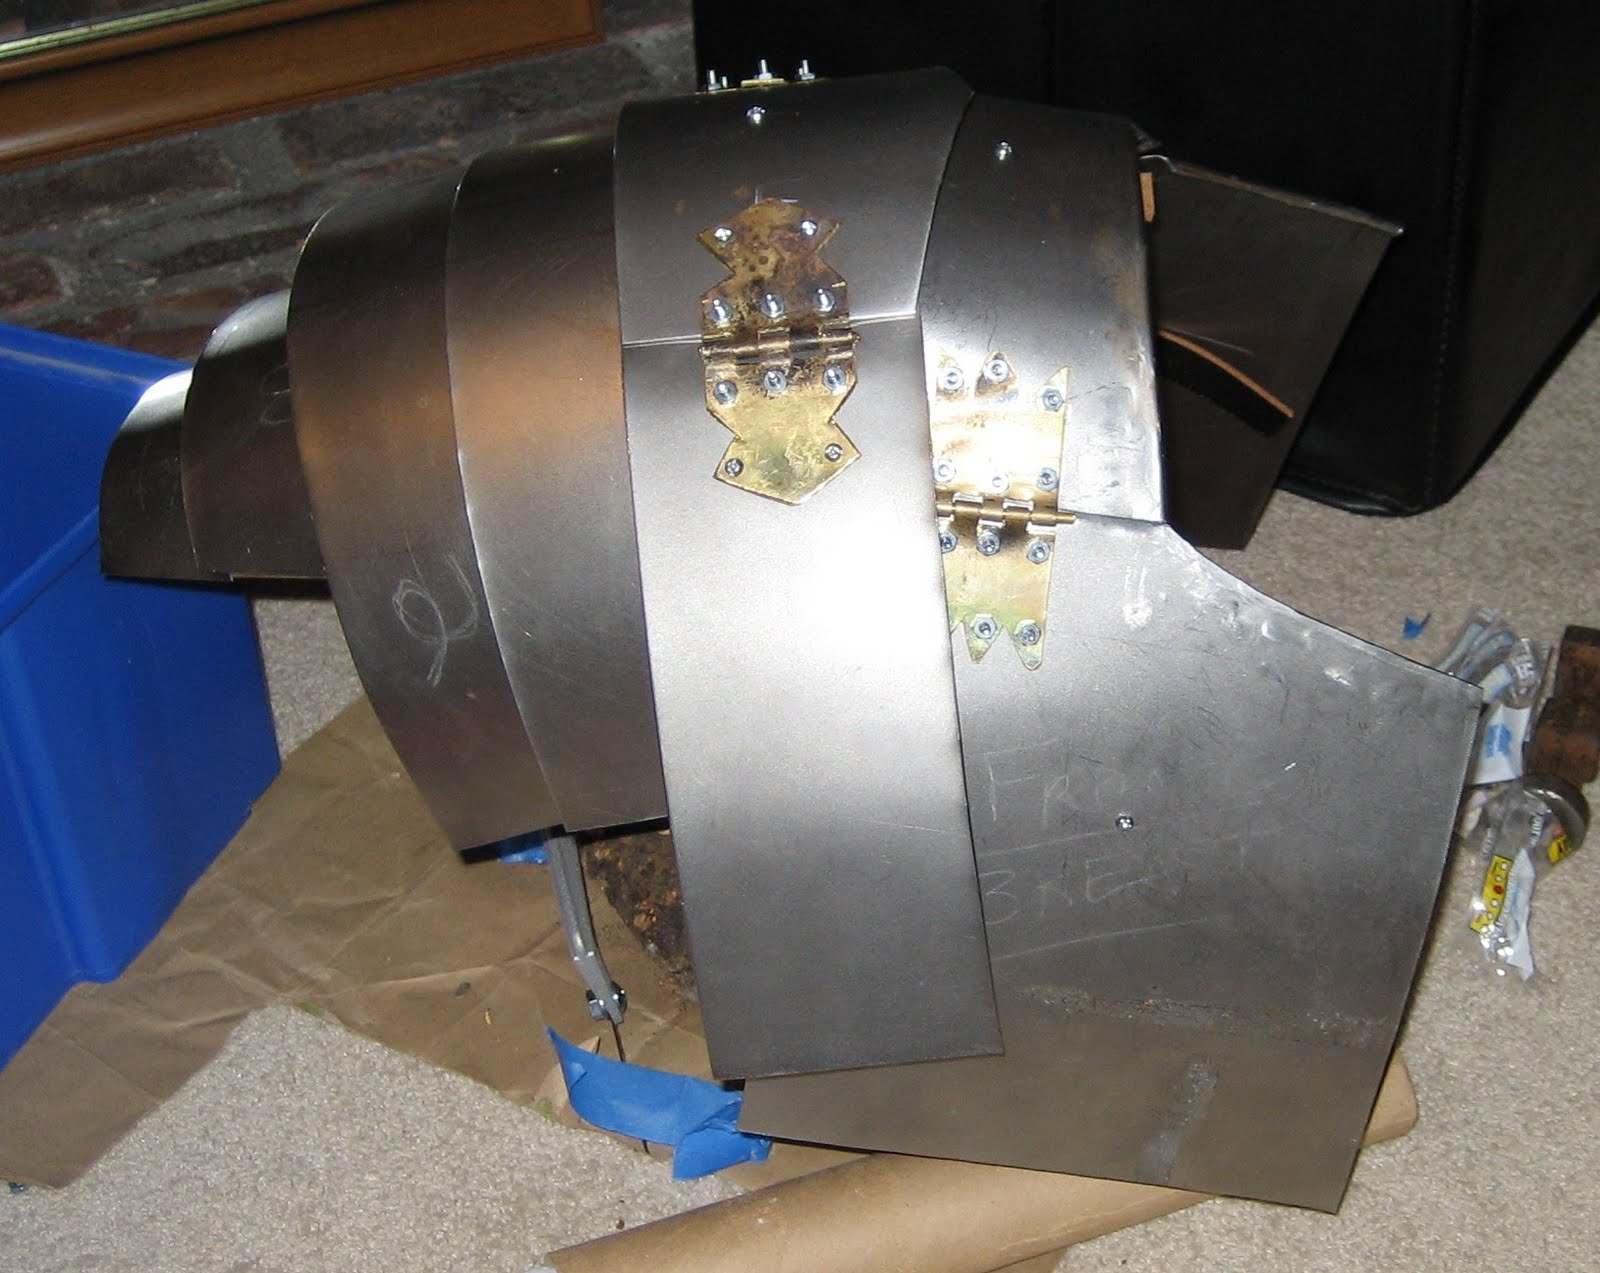
Anyways, I was getting a bit tired of rounding corners so instead of working on the next shoulder section I spent some time riveting hinges.

Now, you can buy dome-headed copper rivets in a store (assuming you can find them, I certainly couldn't the last time I looked), but I think that's sort of cheating since it makes all your rivets look unnaturally perfect. What I'm about to show you certainly isn't a great method (you're better off making a plate and riveting tool) but it will get the job done when you can't find (or be bothered to find) the other stuff.

We'll need a pair of those ubiquitous made-in-every-chinese-factory wire strippers, some cutters, a ball pein hammer, a flat surface, a nail, and some 10 or 12 gauge copper wire.


It just so happens that these end nippers have the perfect jaw depth for making the rivet length that I need, so I'm saved the hassle of measuring.


Stick a piece of copper in the smallest set of pass-throughs that it will fit into and set it on the anvil.  (Yes I know that's not what that part of the tool is for)

Peen the protruding end as best you can.  This piece will go inside, so don't worry about looks.  The rivet shank will also bend a bit since the hole isn't the right size, but that doesn't matter too much.


Now flip the tool over and use that nail to pop out your new rivet.


Doesn't look like much at this point, does it?


But once you actually put them in place and peen them they look fine.


Just to put the amount of work in perspective, there are six hinges in this armour, each with 12 of these hand-made copper rivets.  There are also 5 girdle bands with 2 slotted plates requiring 4 rivets each (one set of girdle bands used folded flaps instead of rivets).

That's a total of 112 of the handmade wire rivets that I just described.  Good grief, no wonder so many people cheat with store-bought ones!


Shoulder section is mostly riveted together.  I still need to rivet the hinges on the breast and mid-collar plates, peen the hinge pins, and maybe add some decorative panels to the holes where the girdle bands hook in.  Until all that's done I won't rivet the shoulder onto the breastplate as it would be obnoxious to work with otherwise.

Monday, 24 October 2016

Leathering - the rush is on!

Hey folks - not much time these days to spend on writing up careful updates.  The Halloween deadline is fast approaching.

Today I dismantled both girdle sections and rounded all the sharp corners (52 of those) and ground, hammered, and/or filed all the rough edges (lots of those from tin snips).  I also smoothed out a few rough edges on the brass tabs and slots.


Corners were snipped off, then a dremel or file was used to clean up the fine corners and the aforementioned rough edges.  Steel wool was used to rub along the finished edges to take off any remaining wire edges / coarseness.

I also started riveting the slotted side of the girdle plates.  I am cheating a bit on these rivets since they mostly don't show.  Inside of making each rivet by hand from copper wire (as I have done for the decorative brass plates and hinges), I am using galvanised roofing nails.  These have the advantage of being less work and including their own washer - the nail head.  Once cut off and peened, their origin is only visible from the inside of the armour, which is not a concern for me.

I have not attached the topmost girdle band since I want to fine-tune the hooks and rivet those on first.


Tuesday, 18 October 2016

First Complete Test Assembly

Lots of bolts to be replaced with rivets.  Lot of soot and goop to be removed.  Lots of edges to file and corners to round.  A few decorative elements to add, and maybe even a set of shoulder section hinges to make.

But in spite of all that... it's still awfully exciting to see it all put together for the first time.


Saturday, 15 October 2016

Girdle Bands - Adding leathers

Not that long ago, I mentioned a lack of illustrative mistakes.  Today I will bring you at least two.

As you may recall, there are a number of made-up girdle bands waiting to be assembled.  Well, today's first mistake relates to those - I didn't put the rivets holes for leathering into the bands.  Now I'll have to add those (and put holes into the leather itself) with them already shaped, which is much less convenient.


First things first - I had to look at the pathetically mismatched eclectic selection of bands and determine front/back and what order I would hang them in.  Everything got labelled, probably past the point of common sense, but it's better to mark too much than to mark too little (and make a mistake because of it).

This brings me to an important armouring tool which (quite frankly) I had forgotten all about - soapstone.  Yes, those lovely "B"s are made with soapstone - not chalk!  Soapstone marks much better, is less fragile, and hits a nice sweet spot between being difficult to smudge but easy to remove.


Since I made the mistake of leaving this task until the bands were already bent, marking the points for rivets required a measuring string which I could lay across the inside of the lames.  I suppose I could have eyeballed it, but this seemed more foolproof.


As described in previous posts, a center punch is used to mark a nice divot in the metal where the hole should go.  The metal punch has a small tooth which is used to 'find' the divot and make sure you're putting the hole exactly where you want it.

Leathering is then the process of slowly adding each lame to the leather strip.  You can see here I am using nuts and bolts as my temporary "rivets" while testing the fit.  These will be replaced with actual rivets during the final assembly.


Note the black tape.  This is added to provide a visual guide of how much overlap is being added with each piece.


Also note that I'm still using second-hand belts for my leathers rather than buying the real stuff.


Our friend the leather punch makes an appearance again.


Here's another shot - note the how the black tape helps line things up consistently.


Finally, this brings us the to second mistake of this post.  After taking all these pictures and completing the first leather, it finally occurred to me that I need three leathers per girdle half...  I should have done all three at the same time!  Instead I had to take these girdle bands apart and start all over again from the markings to the holes.


Last picture from Saturday is the other half of the girdle bands all laid out and marked.


The more observant among your may have already noted that 5 simply isn't enough girdle bands... and you're right!  I actually have six for each side, but after a test fitting on Saturday evening I confirmed that even that would be a bit short.

Sunday's post covers the reaction to this discovery.

Thursday, 11 August 2011

New Leathering Method in Practice

I decided to put my theory into practice, to see if it could repair my faulty shoulder section.  The short answer is...  YES!  The only thing I changed was the holes in the straps! 


Below: Series of pictures demonstrating how the leathers flex when you raise your arm.  Note how the front & rear leathers stay flat and relaxed - only the central leather has to move.  You could optimize this by using a thicker leather on the front & rear and a thinner one centrally.


Some pictures of the releathering process...


Attach central leather to set the minimum overlap.


Below:  After attaching the central leather, I am tilting the lame to the desired angle so I can mark the new hole locations on the straps.  Note how this results in more overlap at the front & back than it does in the center.

(You don't strictly need to clamp things in place, but it definitely helped me to take pictures of the process. )


Again, attach central leather first to select overlap.


Angle the plates, mark the holes, etc.


My mirror is dirty... need some windex.


Maybe a little bit too much clamping....


Here are the leathers from inside that shoulder section...

Purple dots - original rivet placements (BEFORE picture)
Green dots - revised rivet placements (AFTER picture)


Below: The same image, except I have clearly labelled which sets of holes go together. 


Saturday, 6 August 2011

Adventures in Leathering and Assembly


OK - As previously mentioned, I put holes in the lesser shoulder plates according to a pattern I was working from, and that turned out to have been a poor choice.  Anyways, no pictures of that process, but I will be outlining a leathering method of my own devising in the next post.  Above is our starting point - for better or worse, the lesser shoulder plates are assembled, and now we want to attach the upper shoulder guard and breastplate assembly.  As you can see above, I've laid the plates out flat so I can check how they are lining up while still accessing the central leather.  In this pic I've already marked and cut the holes on the central leather - that's the easy part.  Now we need to do the sides.

As you can see in the picture above, (and in several other pictures from recent posts) I sort of traced the strap outlines on the breast and back plates -- this was done while holding them upright (as though the shoulder was being worn).  After I marked the outline of where the strap would run, I eyeballed it and marked an "X" for the riveting point near the center of the plates.

After drilling the holes, I repeated the "hold upright and lay strap against plate" process, but this time I used a screwdriver to push through the new hole in the plate and mark the location on the strap.  Then all that remained was to punch the hole in the strap and connect the plates.

Below, I have connected the breast plates to all three leathers.  It's now time to attach the front and rear leathers to the upper shoulderguard - which turned out to be the most annoying part of the process of all.  Below, all plates are attached on the central leather -- only the front and rear leather remain to be completed.


I planned to use the same technique -- I'd fold the plates up as though the shoulder was being worn, and then mark the outlines of the strap on the plate.  This turned out to be a lot more difficult than I thought, with plates flapping all over the place, lames twisting out of true alignment, etc.  Then I tried setting the whole unit on a stump and tried to let gravity do the work for me:


Unfortunately, this made it more or less impossible to see or reach the parts I needed to reach.  Part of the problem here was in getting the upper shoulder to lie down properly on the collar pieces -- I'll talk more about that in a moment.  Anyways, after several minutes of hell trying to figure out how to do it I applied some engineering wisdom and solved the problem with duct tape.


That let me get inside to mark the outlines of the straps with my piece of soapstone.


However, while I was in there, I noticed a major problem in the making:


One of my leathers was running right across the corner of a plate, right along the hinge line.  That would probably wear out the strap and break it in no time!

So when I marked the riveting point on the upper shoulder, I deliberately put it a bit low on that side to force the leather to move away from the hinge line.


The moment of truth!


So there's a couple of problems with this shoulder. The top two issues:

1. Upper Shoulder Doesn't Fit Well.

This is because I took what is essentially a Corbridge A shoulder unit and attached it to a Newstead breast/collar/back plate set.  The central upper shoulder plate isn't wide enough to match the curve of the mid collar plate - In order to make things lie nice and flat, the upper shoulder front & back plates would have to make a sharp curve right in the middle of the hinge face.


2.  Lesser Shoulder Plates Don't Hang Properly


There are several potential causes for this, not least of which is wrong holes, wrong leather, wrong angles, etc.  Solving this issue is the topic of my next post.