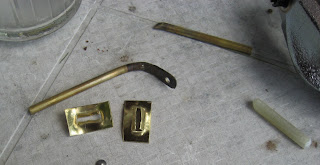
Anyways, time to install a slot!
First things first - we need to make a slot in the steel before we insert the brass. To do this I used a long screwdriver bit - a Robertson. (Some of you more sheltered Americans might know it as "that square one".) Note: The tip of these is often slightly rounded, which makes for a bad chisel. I ground mine flat to get a nice edge on it.

I went to Canadian tire and bought an massive (120pc) set of these power screwdrivers bits in various shapes and sizes for only $20. I don't think you will find a cheaper source of repousse bits and punches precut to a variety of shapes and sizes. A tiny bit of grinding or rounding and you're ready to go, with a pre-tempered bit!
A few punches later and we have a nice, rectangular slot.
Now we insert the brass piece, and fold the flaps over the back. Let me assure you, this is significantly harder than it sounds if you are making a thin slot!
However, the problem that I ran into was that the flaps would sometimes fold slightly crooked -- but since this wasn't visible from the inside, I didn't discover the problem until too late. This left me with a foolishly crooked slot in some places.
Given how difficult it was to get the flaps folded over properly in the first place, this was rather disheartening. In retrospect I can see that it would have been avoidable if I had riveted the plates on first, and then folded the flaps second. For some reason I didn't think of this while I was up at the cottage, but I did decide to switch to riveting the plates instead -- and skipping the flaps.
Using the square punch as shown above, I simply punched out my slot in the next batch of brass plates. Below - cleaning up the slots with a needle file.
A batch of homemade copper rivets. I stuck some 10awg copper in the vice, peened one end, and then nipped it off. As you can see, these are really quite crude...
However, copper is so soft that all trace of that disappeared once they had been installed.
Also, my second generation tabs, installed:


No comments:
Post a Comment